Support
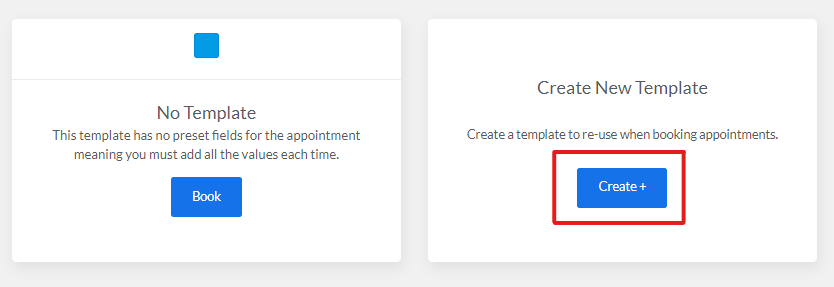
Creating Templates
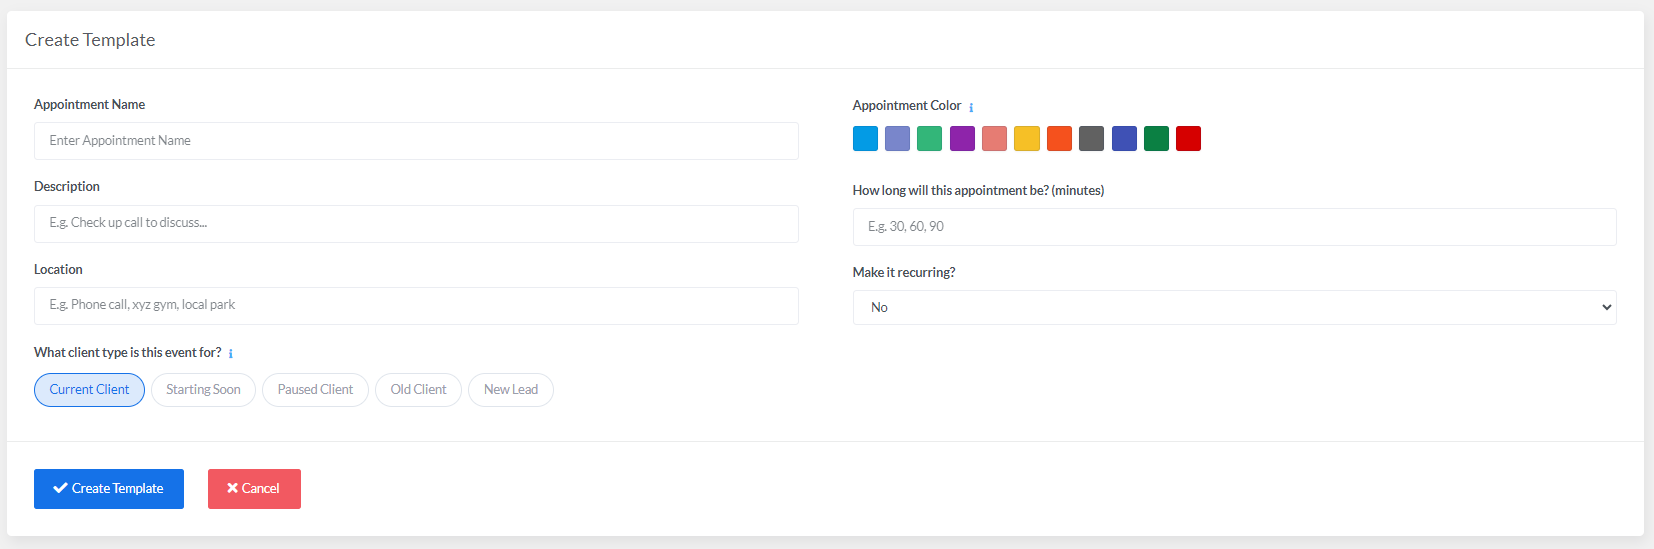
Templates are used when booking an appointment to pre-fill information about the appointment such as duration and location. They can be really useful when you are going to be booking similar appointments repeatedly such as a personal trainer booking a 1-hour session. They're going to book this a lot, so it would make sense to have a template for it.
When it comes to booking the appointment with the template, you can still adjust the details for unique situations such as the location changing.
Creating The Template
The client type for the event is used to streamline booking appointments with this template. For example if you are creating a new template called "45 min 1-2-1 Session", you won't be booking this for a client with a status of "Old Client". By not setting this event for old clients, when you come book an appointment you won't have any clients with that status showing up in the client search bar. By default, the template will have "Current Client" selected but this can be turned off by just clicking that option.
"Appointment Color" is used to help you identify your appointments when viewing them on your calendar page or on your Google Calendar. If you want to make the appointment recurring then you can add your recurrence setting on the template as well.